What Robin Eats

"A Strong Body Equals a Healthy Mind."


Leave a comment

Plant Based Charcuterie Board in collaboration with Back to Nature.

There’s a whole lotta love that went into this festive plant-based charcuterie board! What do you get most excited about when you see a charcuterie board? For me, it’s the crackers. I need to have a solid base to layer all the other charcuterie board goodies on to.
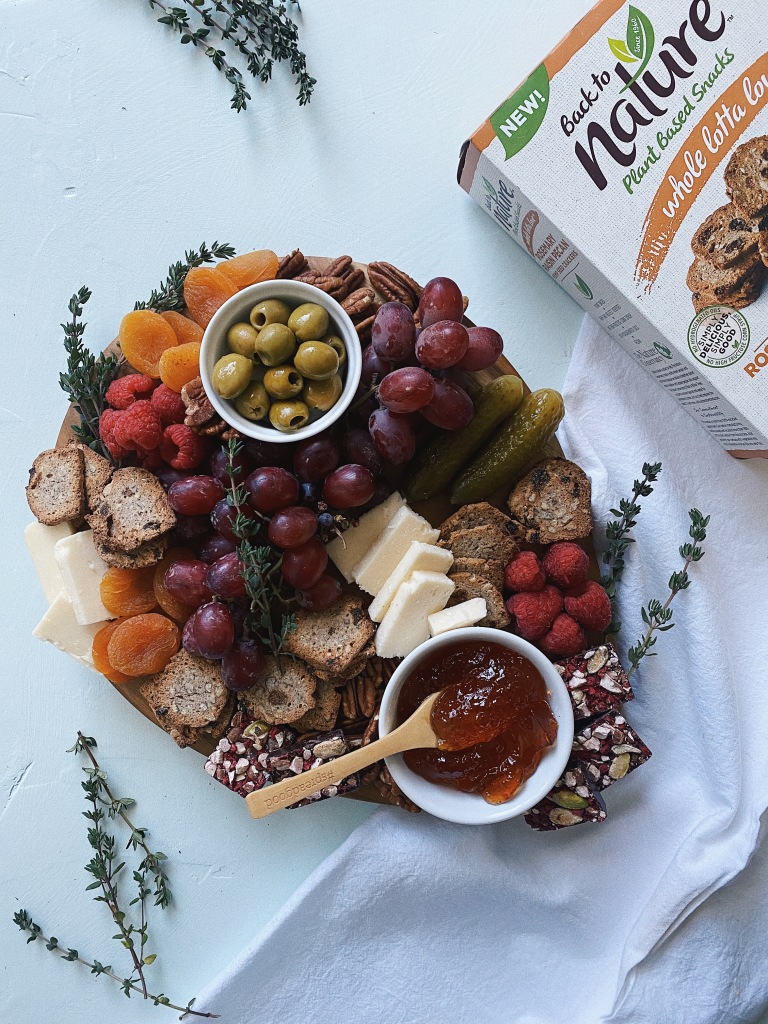
This is why I was jumping for joy when I heard that Back to Nature was launching two new hemp seed cracker flavors at Whole Foods Market – Cranberry Hazelnut Hemp Seed Crackers and Rosemary Raisin Pecan Hemp Seed Crackers. Both new cracker flavors are perfect on their own or dressed up with all the goodies from my holiday plant-based charcuterie board! Let’s talk about what’s going on this delicious looking board.

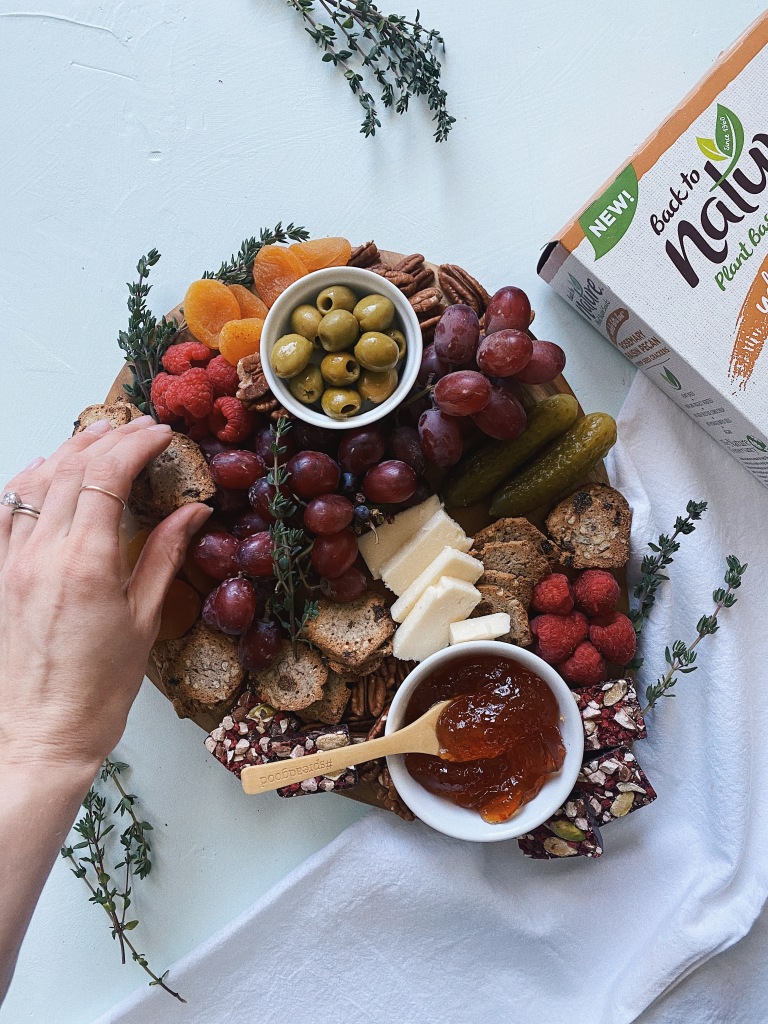
I like a little bit of savory and a whole lotta sweet on my charcuterie boards. I started with green olives and habanero jam. Then, organic red grapes, raspberries, dried apricots, and dill pickles. Next up was the star of the show, Back to Nature’s new Rosemary Raisin Pecan Hemp Seed Crackers. They are baked with hemp seeds, rosemary, raisins, and pecans! I am seriously surprised that any crackers made it onto the board, I couldn’t stop eating them! I added some raw pecans, plant-based cheese, raspberry dark chocolate pieces, and fresh thyme to finish it off. This setup is perfect for any occasion, Joel and I enjoyed this for lunch right after I finished shooting!
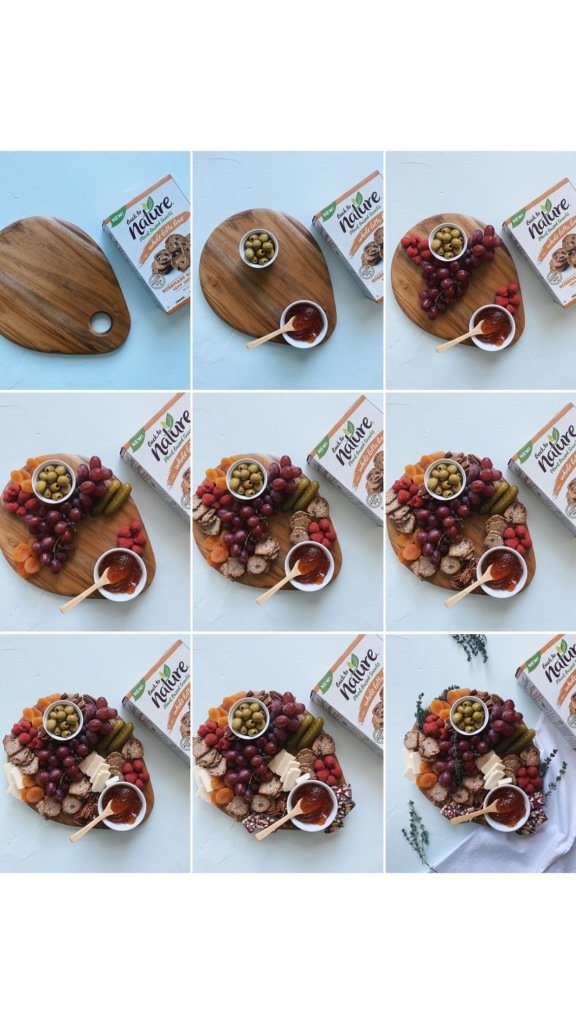
Head over to Back to Nature’s website, https://backtonaturefoods.com/coupons, for a $1 off 1 a box print at home coupon. Trust me, you need both of these new cracker flavors in your life asap!

Leave a comment

Pumpkin Carrot Cake

Over the last two weeks I’ve become pretty passionate about one thing and that thing is this pumpkin carrot cake. I’ve made it twice and I already plan on making it again this weekend!

Pumpkin Carrot Cake:

  • 3–4 large carrots, peeled and grated (2-cups packed)
  • 3/4 cup white whole wheat flour (or all purpose flour)
  • 3/4 cup almond flour
  • 1/2 cup brown sugar (or coconut sugar)
  • 1/2 teaspoon baking powder
  • 1/2 teaspoon baking soda
  • 1 teaspoon pumpkin spice
  • 1/2 teaspoon cinnamon
  • 1/8 teaspoon sea salt
  • 1/3 cup pumpkin puree
  • 2 large eggs
  • 1 teaspoon vanilla extract
  • 1/4 cup maple syrup
  • 1/4 cup unsweetened milk of choice
  • 2 tablespoons melted coconut oil

Cream Cheese Frosting:

  • 1/2 cup cream cheese of choice, room temperature
  • 1/2 cup plain greek yogurt
  • 2 tablespoons monkfruit powdered sugar
  • 2 tablespoons maple syrup

Instructions:

  • Preheat oven to 350ºF. Spray a 9×9-inch pan with nonstick cooking spray and line with parchment paper. Set aside.
  • Peel and grate the carrots. Place grated carrot on 2 pieces of paper towel and squeeze out as much of the moisture as possible.
  • Measure out 2 cups of grated carrots and place into a large bowl along with the rest of the dry ingredients and mix.
  • In a medium bowl, mix together wet ingredients.
  • Add wet ingredients into the dry ingredients and mix.
  • Pour into the prepared pan and bake for 25-30 minutes.
  • Remove from the oven and cool completely before frosting.

Cream Cheese Frosting:

  • While the carrot cake is cooling, make the cream cheese frosting. Place all ingredients into a medium bowl and mix until smooth.
  • Frost the cooled cake and sprinkle some cinnamon on top if desired. Refrigerate leftovers for up to five days.

Have you ever tried pumpkin and carrot cake together?! I has been my go-to lately and I can’t see myself stopping anytime soon.


Leave a comment

Triple Berry Mini Cast Iron Crisp

There are a lot of crisps going around the gram right now but why not add one more? I’ve finally mastered a crisp topping that I really love and that doesn’t have too much going on. Use any berries or other crisp approved fruit you’d like, I did strawberries, peaches, and cherries!

Processed with VSCO with hb2 preset

Triple Fruity Crisp in a mini cast iron skillet (double the recipe to make one regular size skillet)-

Topping:

* 1/2 cup gluten free rolled oats

* 1/4 cup almond flour

* 3 tbsp brown sugar

* 1/2 tsp cinnamon

* Dash of sea salt

* 2 tbsp melted coconut oil

Filling:

* 2 cups berries and fruit of choice, I used pitted cherries pitted, peaches, and strawberries and cut into 1/2 inch slices

* 2 tbsp maple syrup

* 1/2 tsp vanilla extract

* 1 tsp cinnamon

* 1 + 1/2  tbsp cornstarch

Directions:

* Preheat oven to 350° F. In a medium sized bowl combine the oats, almond meal, brown sugar, cinnamon, and sea salt. Pour in the melted coconut oil and use your hands to combine everything until crumbles form.

* In a medium bowl combine the filling ingredients and stir together until you can no longer see the cornstarch. Pour the filling into a mini cast iron skillet. Spread the topping evenly over the apricots and place it on the middle rack of the oven.

* Bake for 25-30 minutes or until the top is golden brown and the filling is bubbling. Cool for 5-10 minutes before serving. Serve topped with vanilla ice cream or simple vanilla. Don’t skip this step!

Crisps, do you love them?! I’m becoming more of a fan each day. Cheers!


1 Comment

Cinnamon Turmeric Fig Gluten Free Waffles, Poppy approved!

Friday morning waffles making an appearance on a Monday. These waffles are one of the few ways I enjoy turmeric and I’m not mad about it. Drizzle with a peanut butter syrup drizzles, or a nut butter drizzle of your choice, and you’re set for a perfect morning. Poppy loves these waffles too!

Processed with VSCO with hb2 preset

Cinnamon Turmeric Fig Gluten Free Waffles (makes a big batch so freeze leftovers for a quick morning!):

  • 2 cups 1-to-1 gluten free flour (I have not tried another flour)
  • 1 tbsp baking powder
  • 1/4 tsp sea salt
  • 3 tsp turmeric
  • 1 tsp cinnamon
  • 1/4- 1/2 tsp ginger powder
  • 1 pinch cardamom
  • 2 large eggs
  • 6 tbsp butter, melted
  • 2 tbsp maple syrup
  • 2 cups milk of choice
  • 1 tsp vanilla

Toppings:

  • Yogurt
  • Organic figs
  • Peanut butter syrup drizzle (1 tbsp melted peanut butter, or nut butter of choice, + 1/4 cup maple syrup)

Directions:

  • Heat your waffle iron of choice on medium. Spray with nonstick spray or grease with coconut oil.
  • In a large bowl, whisk together the gf flour, baking powder, sea salt, turmeric, cinnamon, ginger, and cardamom.
  • In a medium bowl, whisk together the eggs, coconut oil, maple syrup, milk, and vanilla.
  • Pour the wet ingredients into the dry ingredients and whisk until smooth.
  • Pour 1/4 cup of waffle batter onto each waffle mold and waffle.
  • Let cool slightly and serve with all the toppings! Freeze extra waffles for an easy morning.

Thoughts on turmeric? Leave a comment below and let me know if you make these waffles!


Leave a comment

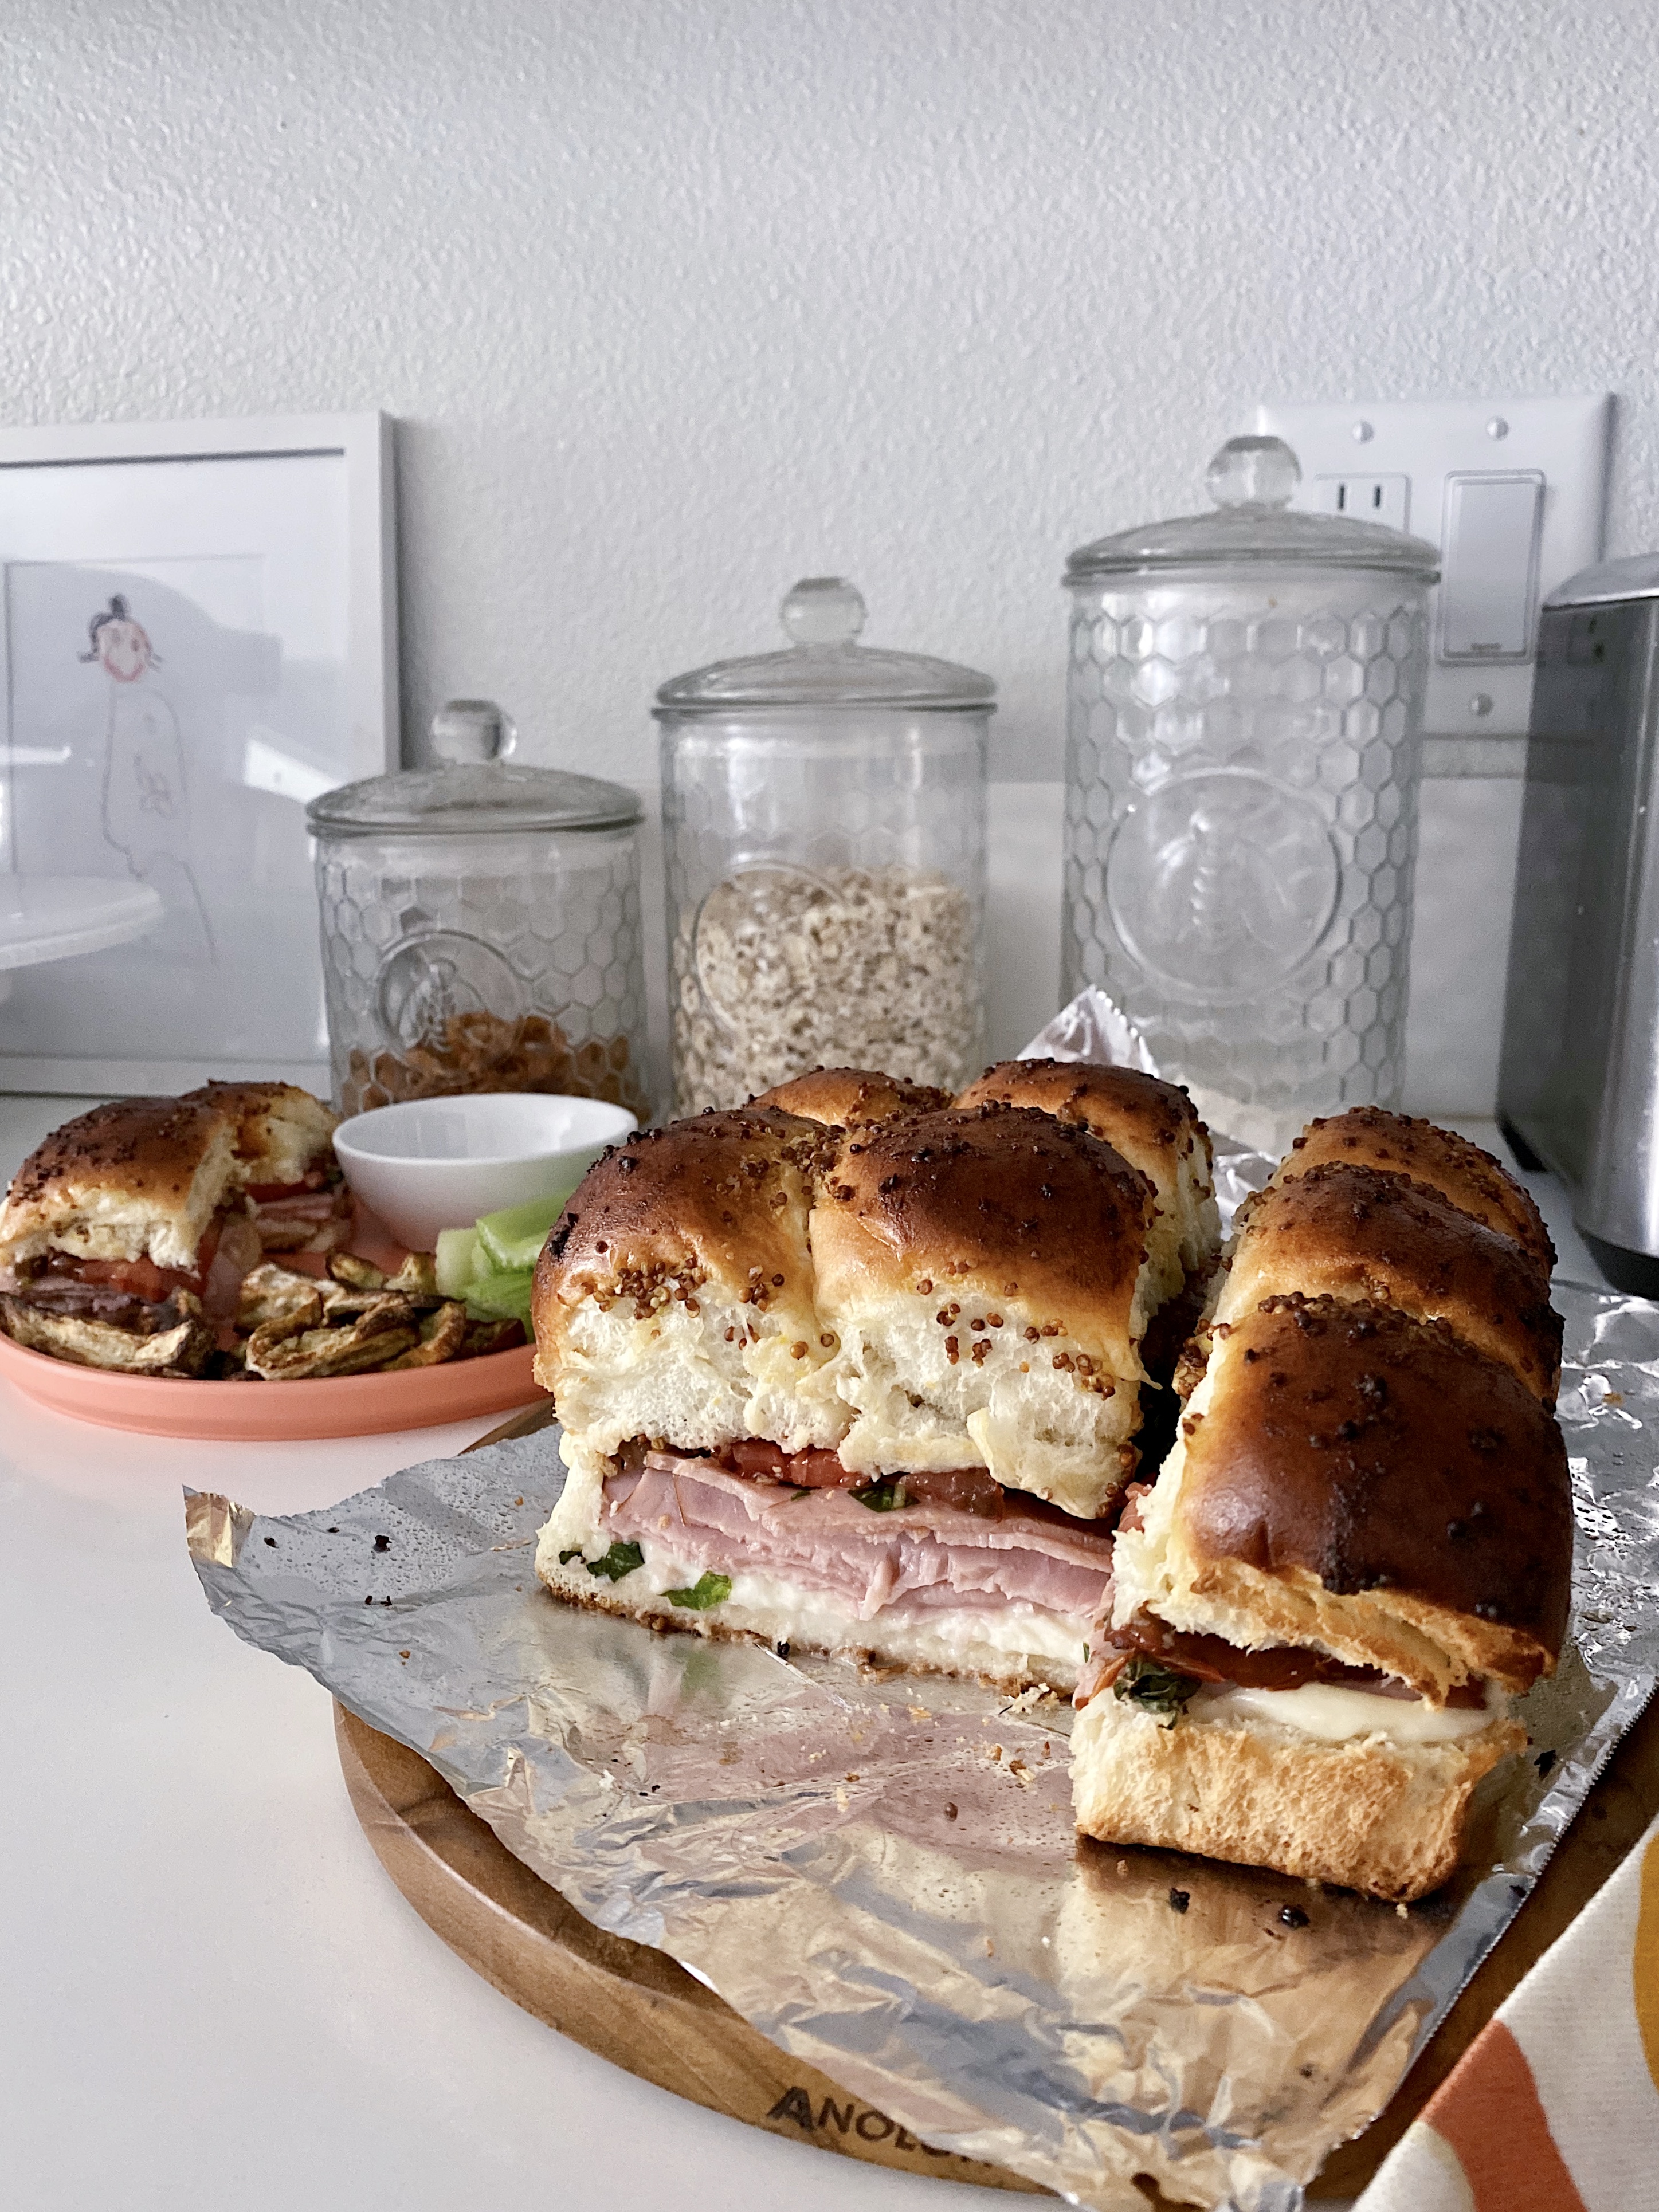
Baked Ham & Caprese Hawaiian Sweet Rolls

I don’t share savory meals often but when I do they’re usually pretty simple. Simple to make but not simple in taste!

Processed with VSCO with hb2 preset

Keeks from @keeksitsimple had me drooling over her OG ham & swiss baked Hawaiian rolls when I made them a month ago and this time I made a few minor changes. You can really stuff these bad boys with anything and it’ll be a bomb sandwich! The leftovers are great too, just broil for 3-5 minutes to crispy them back up after refrigerating.

Baked Ham & Caprese Hawaiian Sweet Rolls:

  • 1 packet Hawaiian sweet rolls (I get the ones from #TraderJoes)
  • 1 & 1/2 packets of organic uncured ham deli meat
  • 1/2 log of fresh mozzarella cheese
  • One slices heirloom tomato
  • Handful of diced fresh basil
  • Balsamic glaze

Topping for buns:

  • 1/2 cup melted butter
  • 1 tbsp Dijon mustard
  • 1 tsp brown sugar
  • 1 tbsp poppyseeds or chia seeds
  • 2 tsp onion powder

Directions:

  • Preheat oven to 350°F and line a small baking sheet with tinfoil or a reusable baking mat. Set aside.
  • Slice the Hawaiian sweet rolls in half without pulling them apart individually. Combine the topping ingredients in a small bowl and brush a little inside the rolls. Place the filling inside the rolls: ham, sliced tomato, fresh basil, drizzle of balsamic glaze, and mozzarella cheese.
  • Place the top of the rolls on top and brush the melted butter mixture over the top of the rolls.
  • Bake for 10-15 minutes, or until the tops are nice and crispy.
  • Let cool for a few minutes before slicing between the rolls to serve. ENOY!


Leave a comment

Blackberry Pita Pizza

It’s never too early to chat pizza if you ask me. This pizza makes me happy and I think it’d make your Saturday!

image

Blackberry Pita Pizza:

* 1 small organic pita

* Dash of EVOO to brush over the pita before topping

* 2 tbsp fresh blackberry chia seed jam

* 1/4 cup dairy free ricotta cheese

* 1 slices prosciutto

* Small handful of fresh basil

* Red chili flakes (optional)

Directions:

* Heat oven to 425°F and spray a baking sheet with non stick cooking spray.

* Plate the pita on the baking sheet, brush with EVOO, spread the blackberry jam all over the top of the pita, dollop on the ricotta cheese, and bake for 10-12 minutes. Or until the pita begins to get golden and crispy.

* Once crisp, remove from oven, top with prosciutto, fresh basil, and red chili flakes if you’d like.

You can switch up pita pizzas so easy! Use a different jam or toss on completely different ingredients. There is no wrong way to pita pizza.


1 Comment

Carrot Banana Bread, Gluten Free.

Bunny wanted to eat all our carrot banana bread but Poppy stopped her. Feeling out of breath with all the baking, laundry, and outside adventures I had this morning with my Poppy girl. God bless nap time, am I right?

Processed with VSCO with hb2 preset

Carrot Banana Bread:

  • 1 cup mashed super ripe banana, 2 medium size bananas
  • 1 cup shredded organic carrots
  • 1/2 cup whole milk organic greek yogurt
  • 1/3 cup pure maple syrup
  • 1 egg, room temperature
  • 1/2 tsp vanilla extract
  • 1 + 1/4 cup gluten free 1-to-1 baking flour (I have not tried any other flour)
  • 3/4 cup gluten free rolled oats
  • 1 tsp cinnamon
  • 1/2 tsp nutmeg
  • 1 tsp baking soda
  • 1/4 cup raisins

Frosting:

  • 1/2 cup probiotic cream cheese (softened)
  • 1/4 cup pure maple syrup
  • 1 scoop vegan vanilla protein powder (optional but I love the added flavor and protein!)

Processed with VSCO with hb2 preset

Directions:

  • Preheat oven to 350F. Spray a bread pan with non stick cooking spray and line with parchment paper.
  • In a food processor, add the bananas, egg, vanilla extract, maple syrup, greek yogurt, cinnamon, and nutmeg. Mix until smooth. Add in shredded carrots and mix until smooth.
  • Add oats, flour, and baking soda. Mix until smooth. Mix in raisins with a silicon spatula.
  • Pour batter into prepped bread pan and bake for 50-60 minutes. My oven usually takes 5-15 minutes longer for any baked recipe I make. I have an oven thermometer and it says it’s the right temperature. That being said, check the bread at 45 if your oven cooks quicker and go from there. Check with a toothpick!
  • Once the bread is bake, let it cool in the bread pan for one hour before cooling on a wire rack.
  • Make the frosting in a mixer or with a hand mixer. Mix until smooth and frost the bread once it’s completely cooled.
  • Once frosted, add some shredded carrots on top if you’d like and refrigerate for one hour before slicing. This helps harden the frosting and slicing colder bread is a lot easier than slicing when the bread is still warm in the middle. Refrigerate for up to 5 days in an air tight container!


Leave a comment

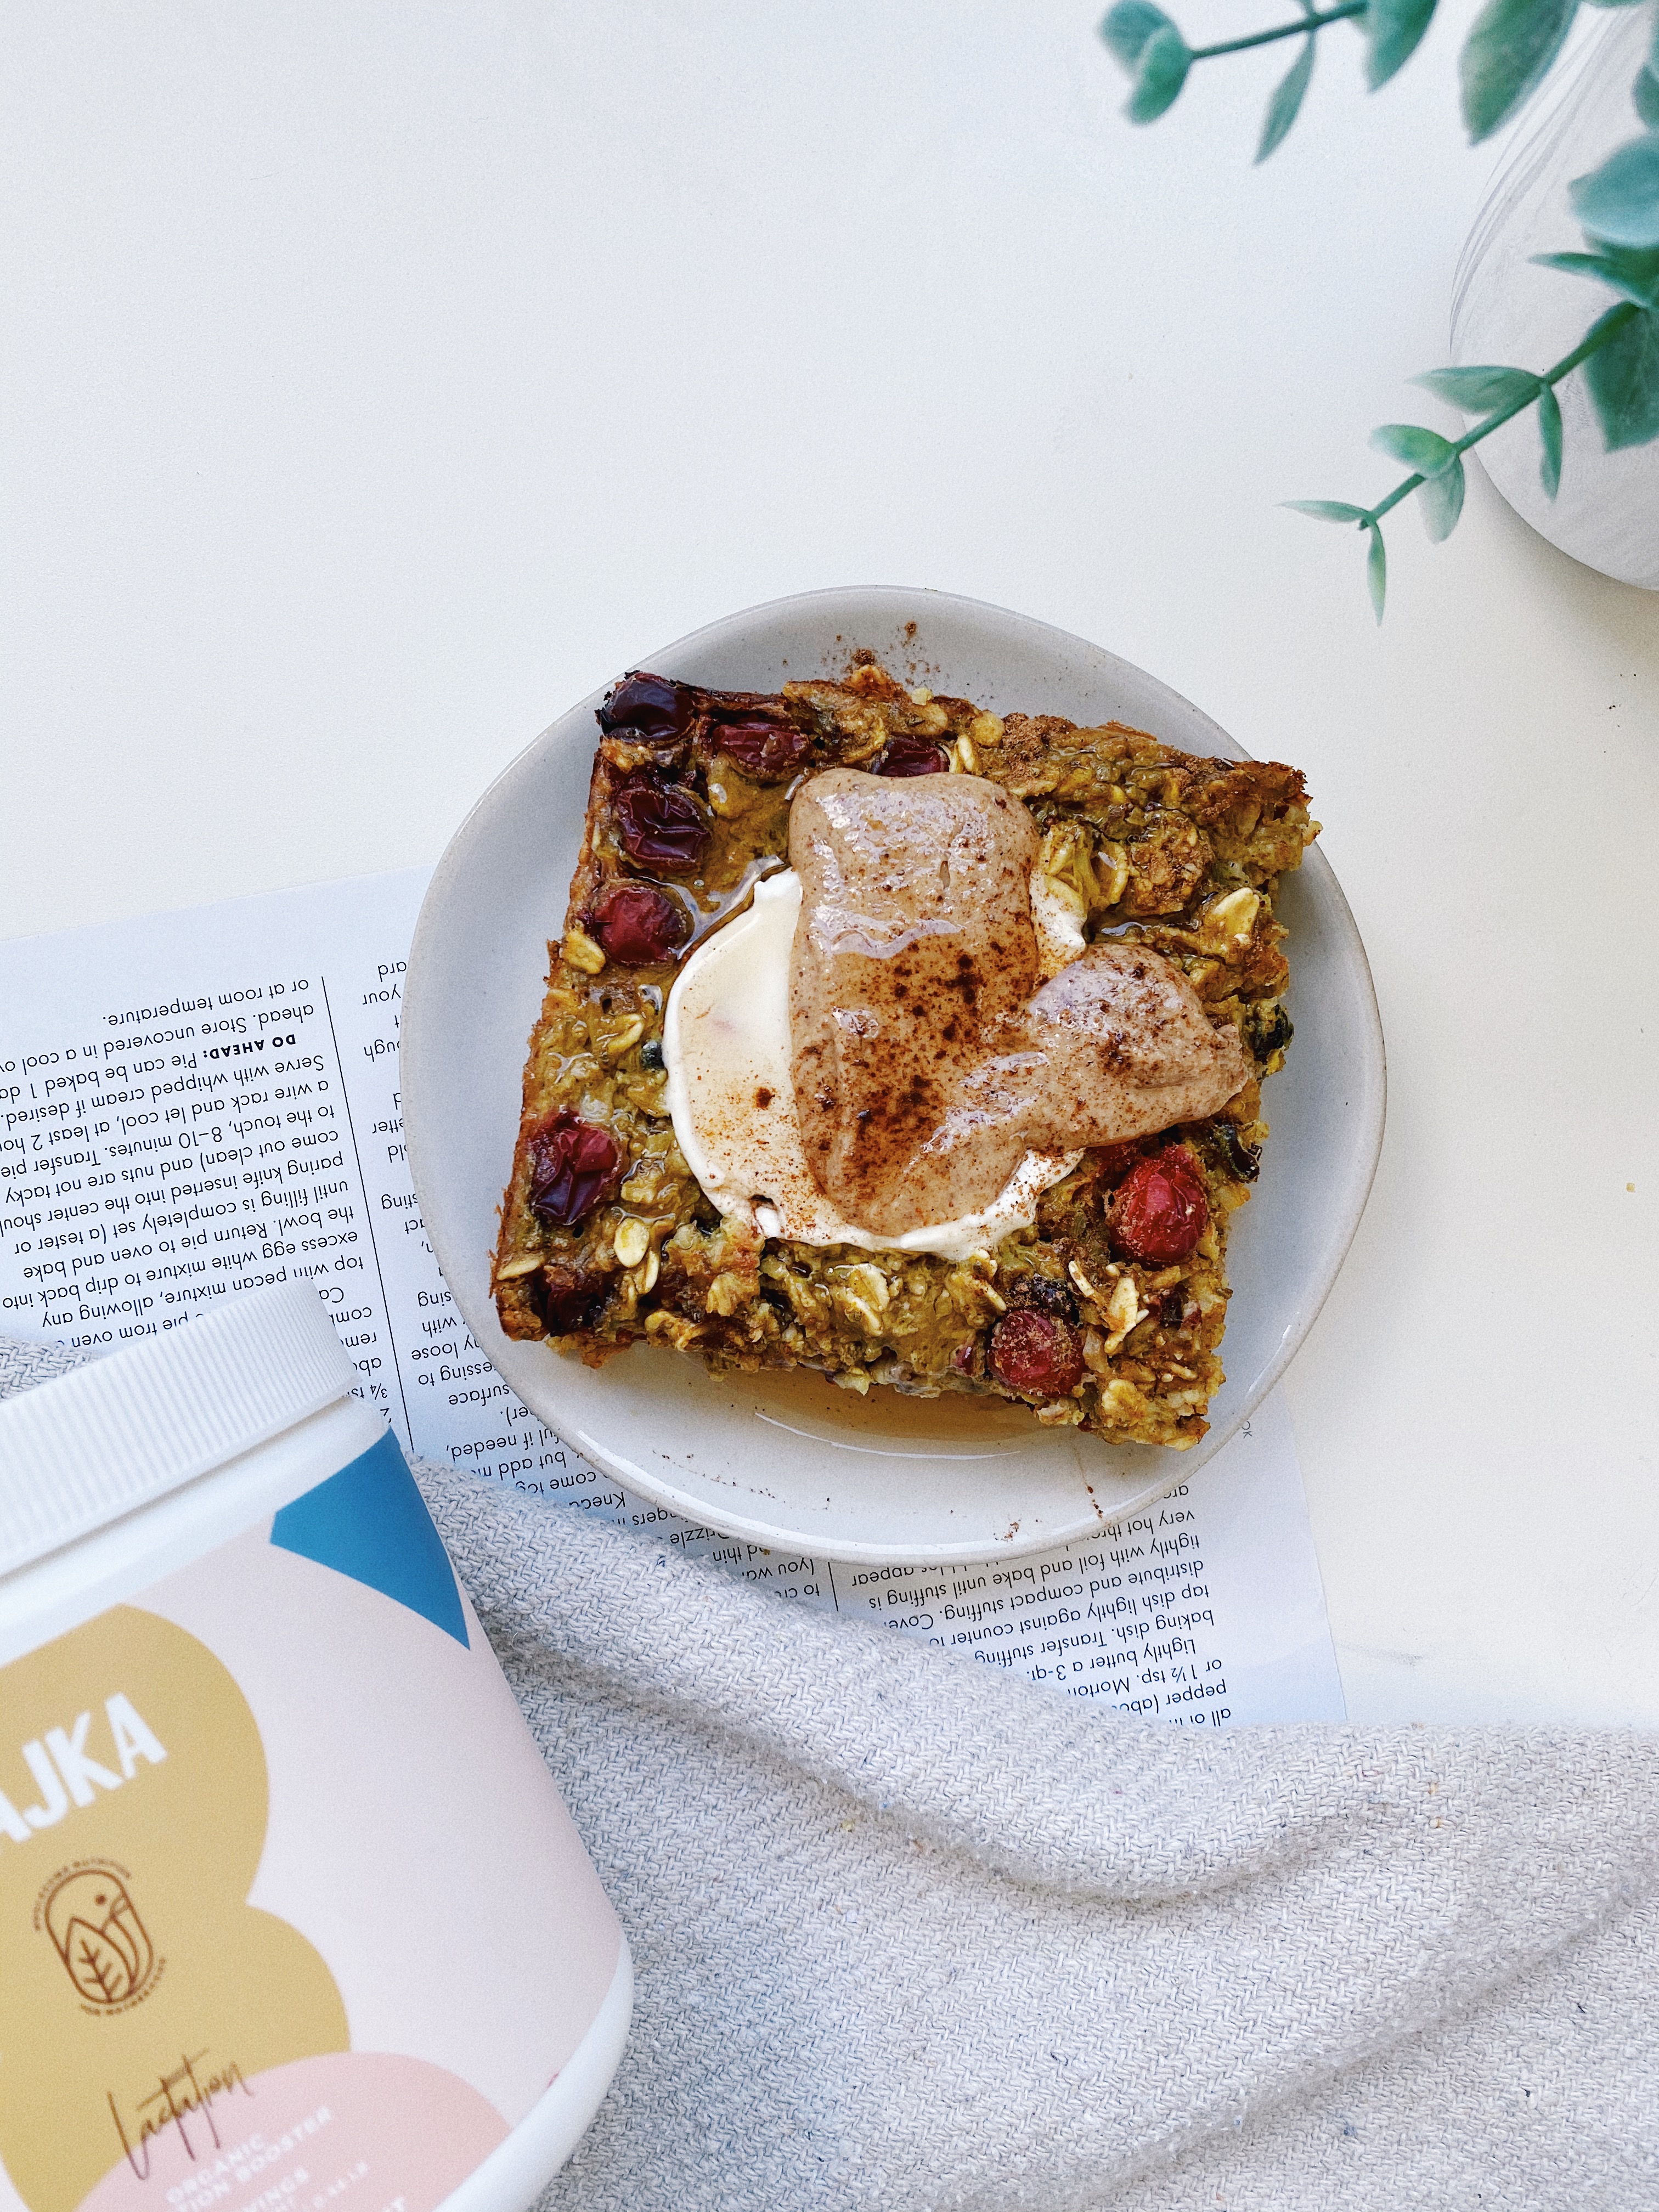
Cranberry Chai Cauli-Oat Bake, in collaboration with Majka.

Brb, teaching Joel how to make this cranberry chai cauli-oat bake before baby Plotnik number two ever happens (not a pregnancy announcement! Just getting more prepared in the food department than I was before). Ha!

Processed with VSCO with hb2 preset

If you don’t know, I love cauli-oat bakes. You CANNOT taste the cauliflower but you can taste all the other yummy nutritious ingredients that are in these bakes. This bake in particular is made with one of my favorites products, especially for mamas, Majka’s vanilla chai lactation booster! You can easily mix this booster powder with hot or cold water to drink, or you can add it to baked goods and smoothies. There is no wrong way to enjoy this extremely beneficial powder. Majka’s vanilla chai lactation booster is the best supplement for breastfeeding moms looking for a healthy boost in their milk supply. This properly formulated powder improves the quality of the milk while also providing strong antioxidant support which may prevent swollen breast tissue and clogged ducts. I have been using Majka’s powders since Poppy was born and I never experienced clogged ducts and my milk supply came in so quickly! I highly suggest checking out all their products because there is something for every mama out there.

Processed with VSCO with hb2 preset

Speaking of products, you can get two free bags of the limited edition Holiday Cherry Bites when you buy a Majka nourishing lactation powder! These bites were my best friend when Poppy was a newborn and they are still so nice to have in the fridge when I need a quick snack. They are the perfect guilt-free snack that gives you the lactation and nutritional support you need. Plus the bites are delicious! It’s a win-win situation.

FOOD STYLING BY SUSIE THEODC.jpeg

What was your breastfeeding experience like? I am thankful that everything went pretty smoothly once Poppy learned to latch. At least I didn’t have to worry about my milk supply!

Cranberry Chai Cauls-Oat Bake, in collaboration with Majka (serves 4).

* 1 + 1/2 cup GF oats

* 1 cup riced cauliflower (I use frozen)

* 2 tbsp chia seeds

* 2 cups nut milk

* 2-4 tbsp coconut sugar (I used only 2 but if you’d like a little more sugar to your cookie add 4)

* 1 whole egg + 1 egg white (can sub flax egg)

* 1 tbsp baking soda

* I/3-1/2 cup fresh cranberries (or use 1/3 cup dried craisins)

* 2 scoops Majka vanilla chai lactation booster

* 3 tbsp cacao nibs

* 1/2 banana, mashed

* 1 tsp vanilla extract

Toppings:

* Probiotic grass fed yogurt

* Banana slices (I got my fruit cutter off of Amazon)

* Maple syrup

*Maple syrup

Directions:

* Preheat oven to 350°F

* Whisk wet ingredients together, including the banana, and then mix in dry. Let mixture soak for 20 minutes!

* Pour into an 8×8 baking dish sprayed within nonstick cooking spray and top with pecan pieces. Bake for 45-50 minutes or until the center is cooked. 

* Let cool slightly before slicing. Top with goodies and enjoy!


1 Comment

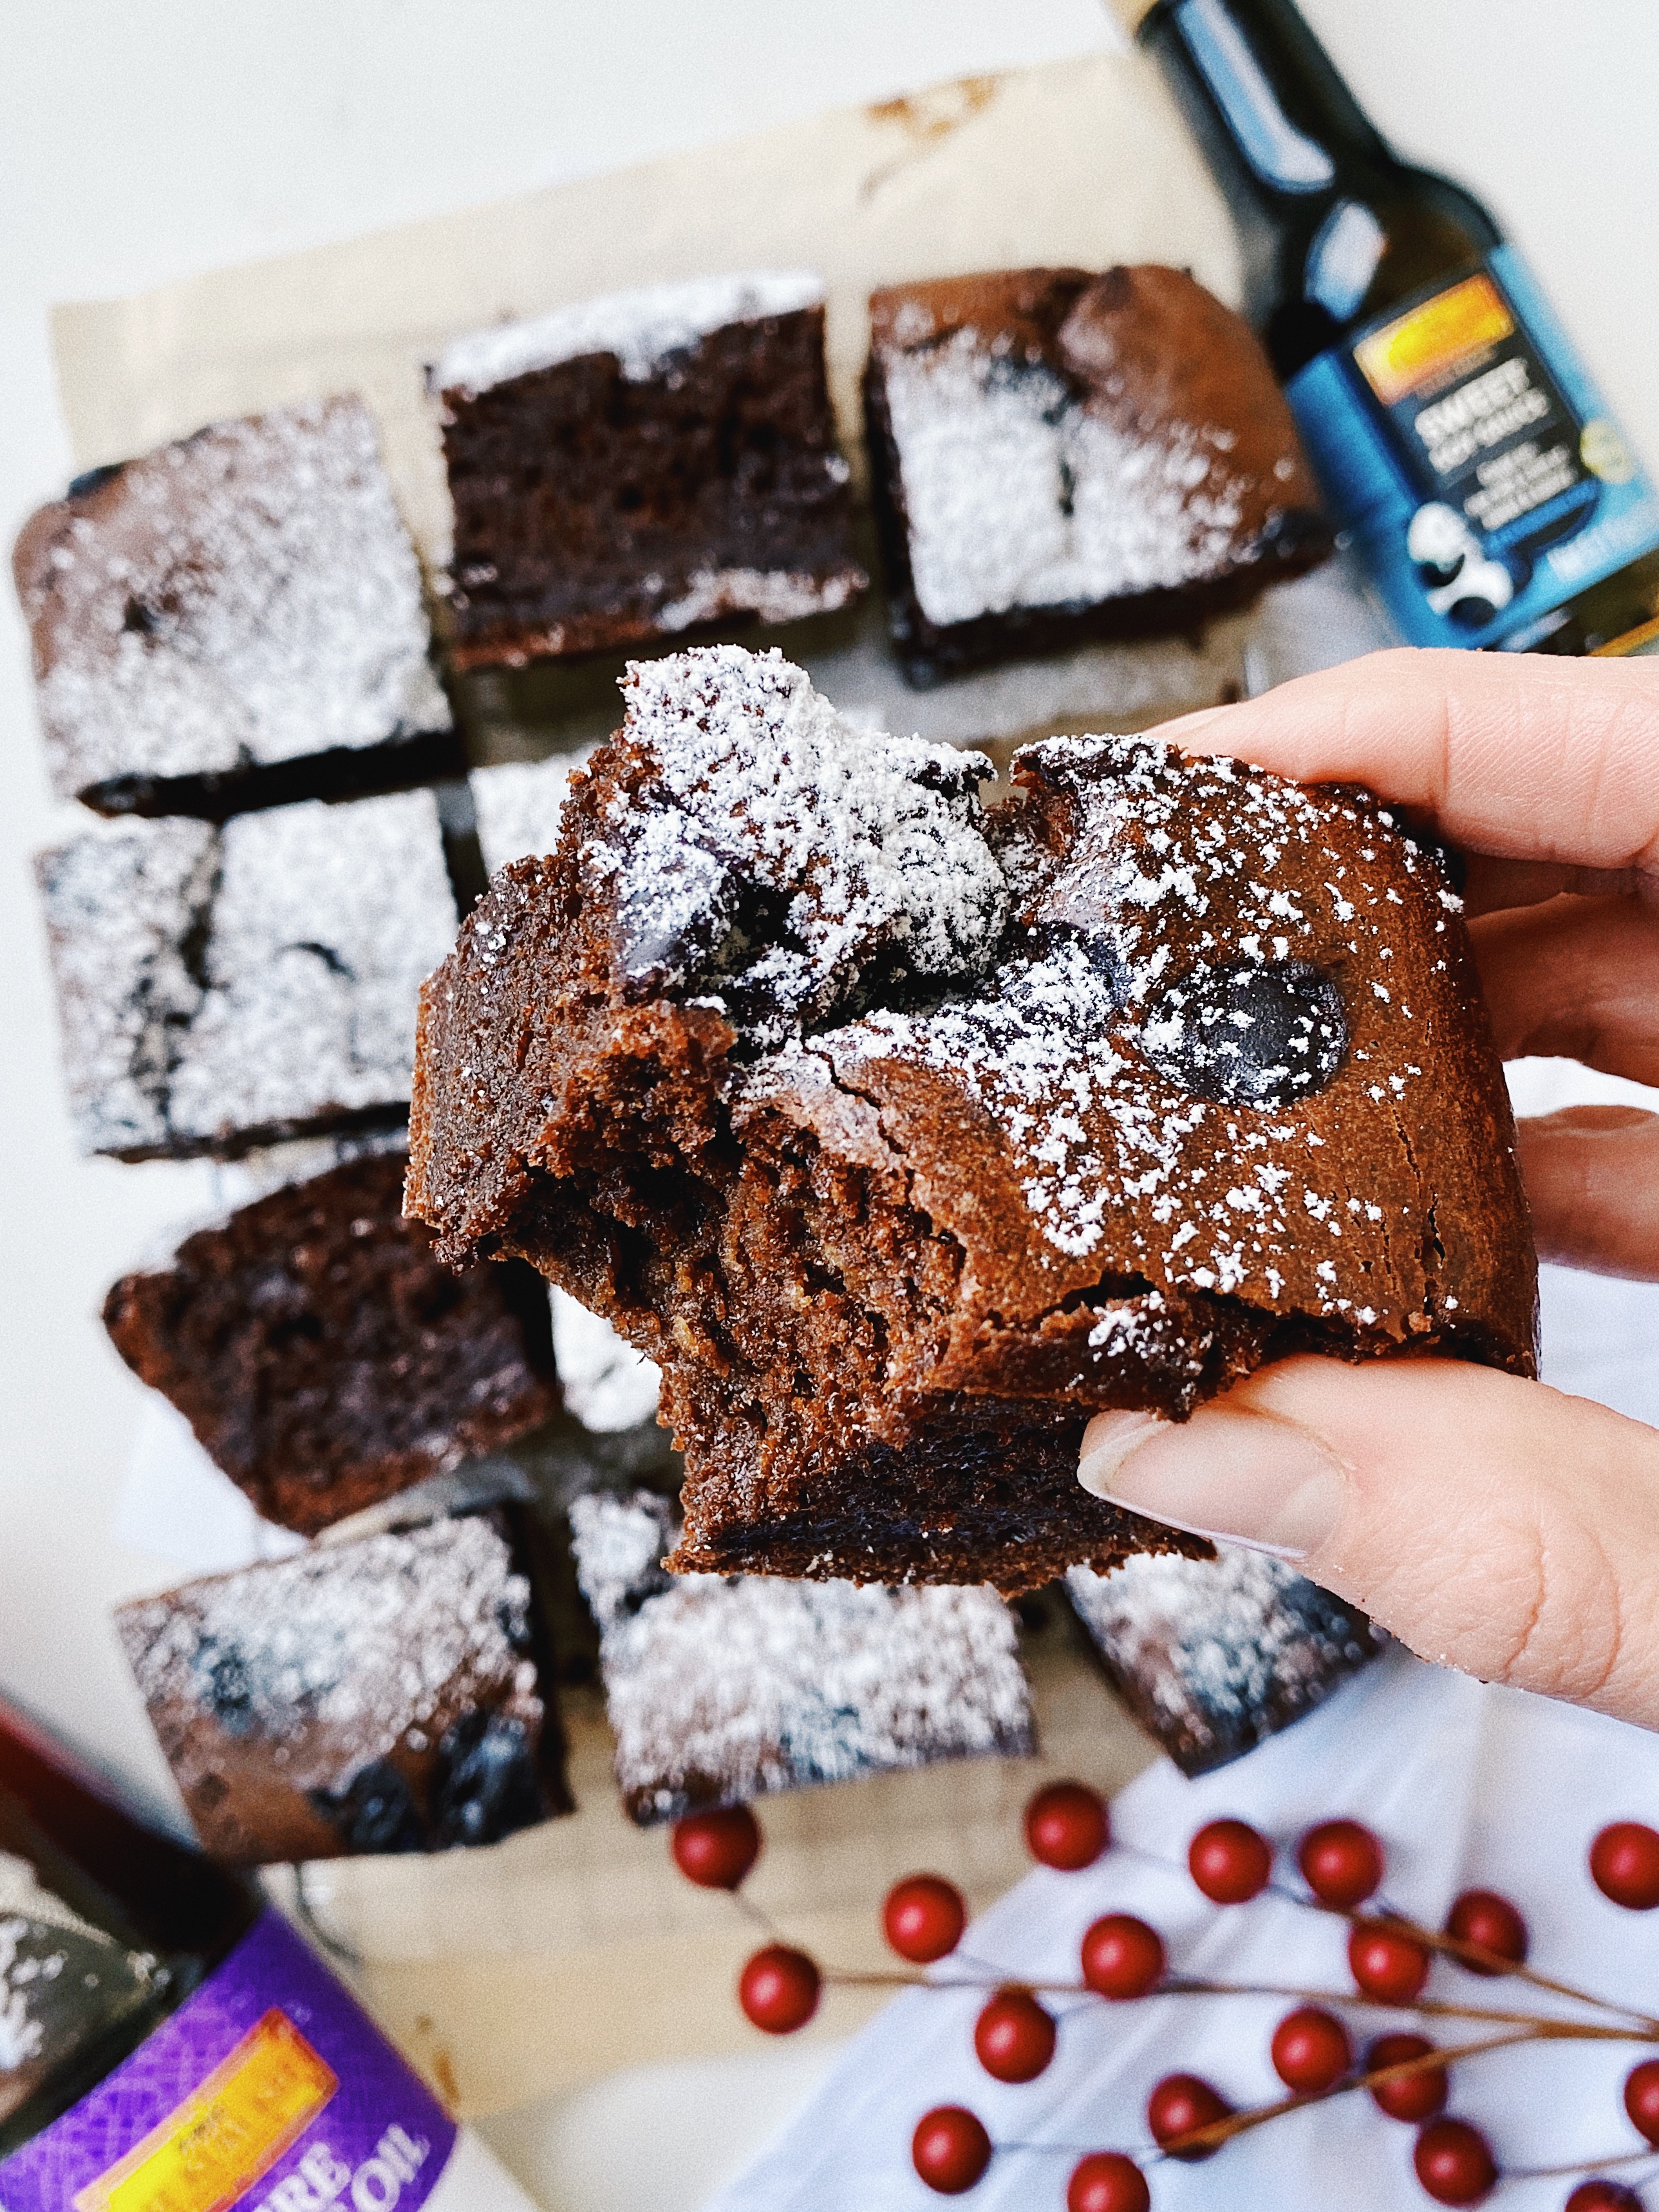
Tahini Brownies, in collaboration with Lee Kum Kee.

A blanket of snow? No thanks. A blanket of powdered sugar? YES PLEASE! 

Processed with VSCO with hb2 preset

If you’ve been following me for a while, or at least five minutes, then you know I am all about the strange but good creations. This is why I drooled all over my phone when Lee Kum Kee reached out for me to make tahini brownies using their Panda Brand Sweet Soy Sauce and Pure Sesame Oil. It was like this recipe was made for me or something. I finished these bad boys off with a monk fruit powdered sugar but they are totally fine without the final dusting.

Processed with VSCO with hb2 preset

Lee Kum Kee offers a wide range of must-have pantry staples that make it easy for people to enjoy authentic Asian flavors and delicious meals at home and within minutes. My recipe wheels have been turning ever since having Lee Kum Kee products in our home and I can’t wait to experiment with them. I am totally using their products this Christmas for an unexpected twist to traditional holiday recipes. Soy sauce and sesame oil aren’t your typical ingredients in a brownie recipe, which makes them the perfect addition to wow your family and friends. Pure Sesame Oil adds a nutty flavor and aroma while the Sweet Soy Sauce has a subtle sweetness to take these brownies to the next level. You can find Lee Kum Kee products at your local grocery store in the Asian food aisle. Now onto these killer tahini brownies from the Lee Kum Kee website!

Processed with VSCO with hb2 preset

Ingredients:

  • 6 oz. bittersweet chocolate (between 60 and 65%), chopped
  • 3 tbsp unsalted grass fed butter
  • 2 large eggs, room temperature
  • 1/4 cup all-purpose flour (I used 1-to-1 gluten free flour)
  • 1 cup sugar (I used monk fruit sugar substitute)
  • 1/3 cup tahini, room temperature
  • 3 tbsp unsweetened cocoa powder
  • 2 tbsp Lee Kum Kee Pure Sesame Oil
  • 1 tbsp vanilla extract
  • 1 tsp Lee Kum Kee Panda Brand Sweet Soy Sauce
  • 1/2 tsp Maldon salt (I used pin Himalayan salt)


Directions:

  • Heat the oven to 350°F. Line an 8×8-inch pan with 2 sheets of parchment paper, overlapping and leaving the edges long so parchment comes up all 4 sides.
  • Melt chocolate and grass fed butter in 30 second increments in the microwave, stirring in between. 
  • Whisk together sugar of choice, tahini, eggs, cocoa powder, Lee Kum Kee Pure Sesame Oil, vanilla, and Lee Kum Kee Panda Brand Sweet Soy Sauce. 
  • Stir in chocolate mixture, then fold in flour until just combined. Scrape into baking pan.
  • Bake until edges are just set and a toothpick inserted in the middle comes out with just a few crumbs, 30 to 35 minutes (remember that everyone’s oven is different!) Sprinkle with pink salt, then let cool. Dust with monk fruit powdered sugar if that’s your thing. Cut into squares and enjoy!


Tahin brownies, would you try it? I gave some to our neighbors and they were obsessed! I don’t blame them. Click here to find Lee Kum Kee near you.


Leave a comment

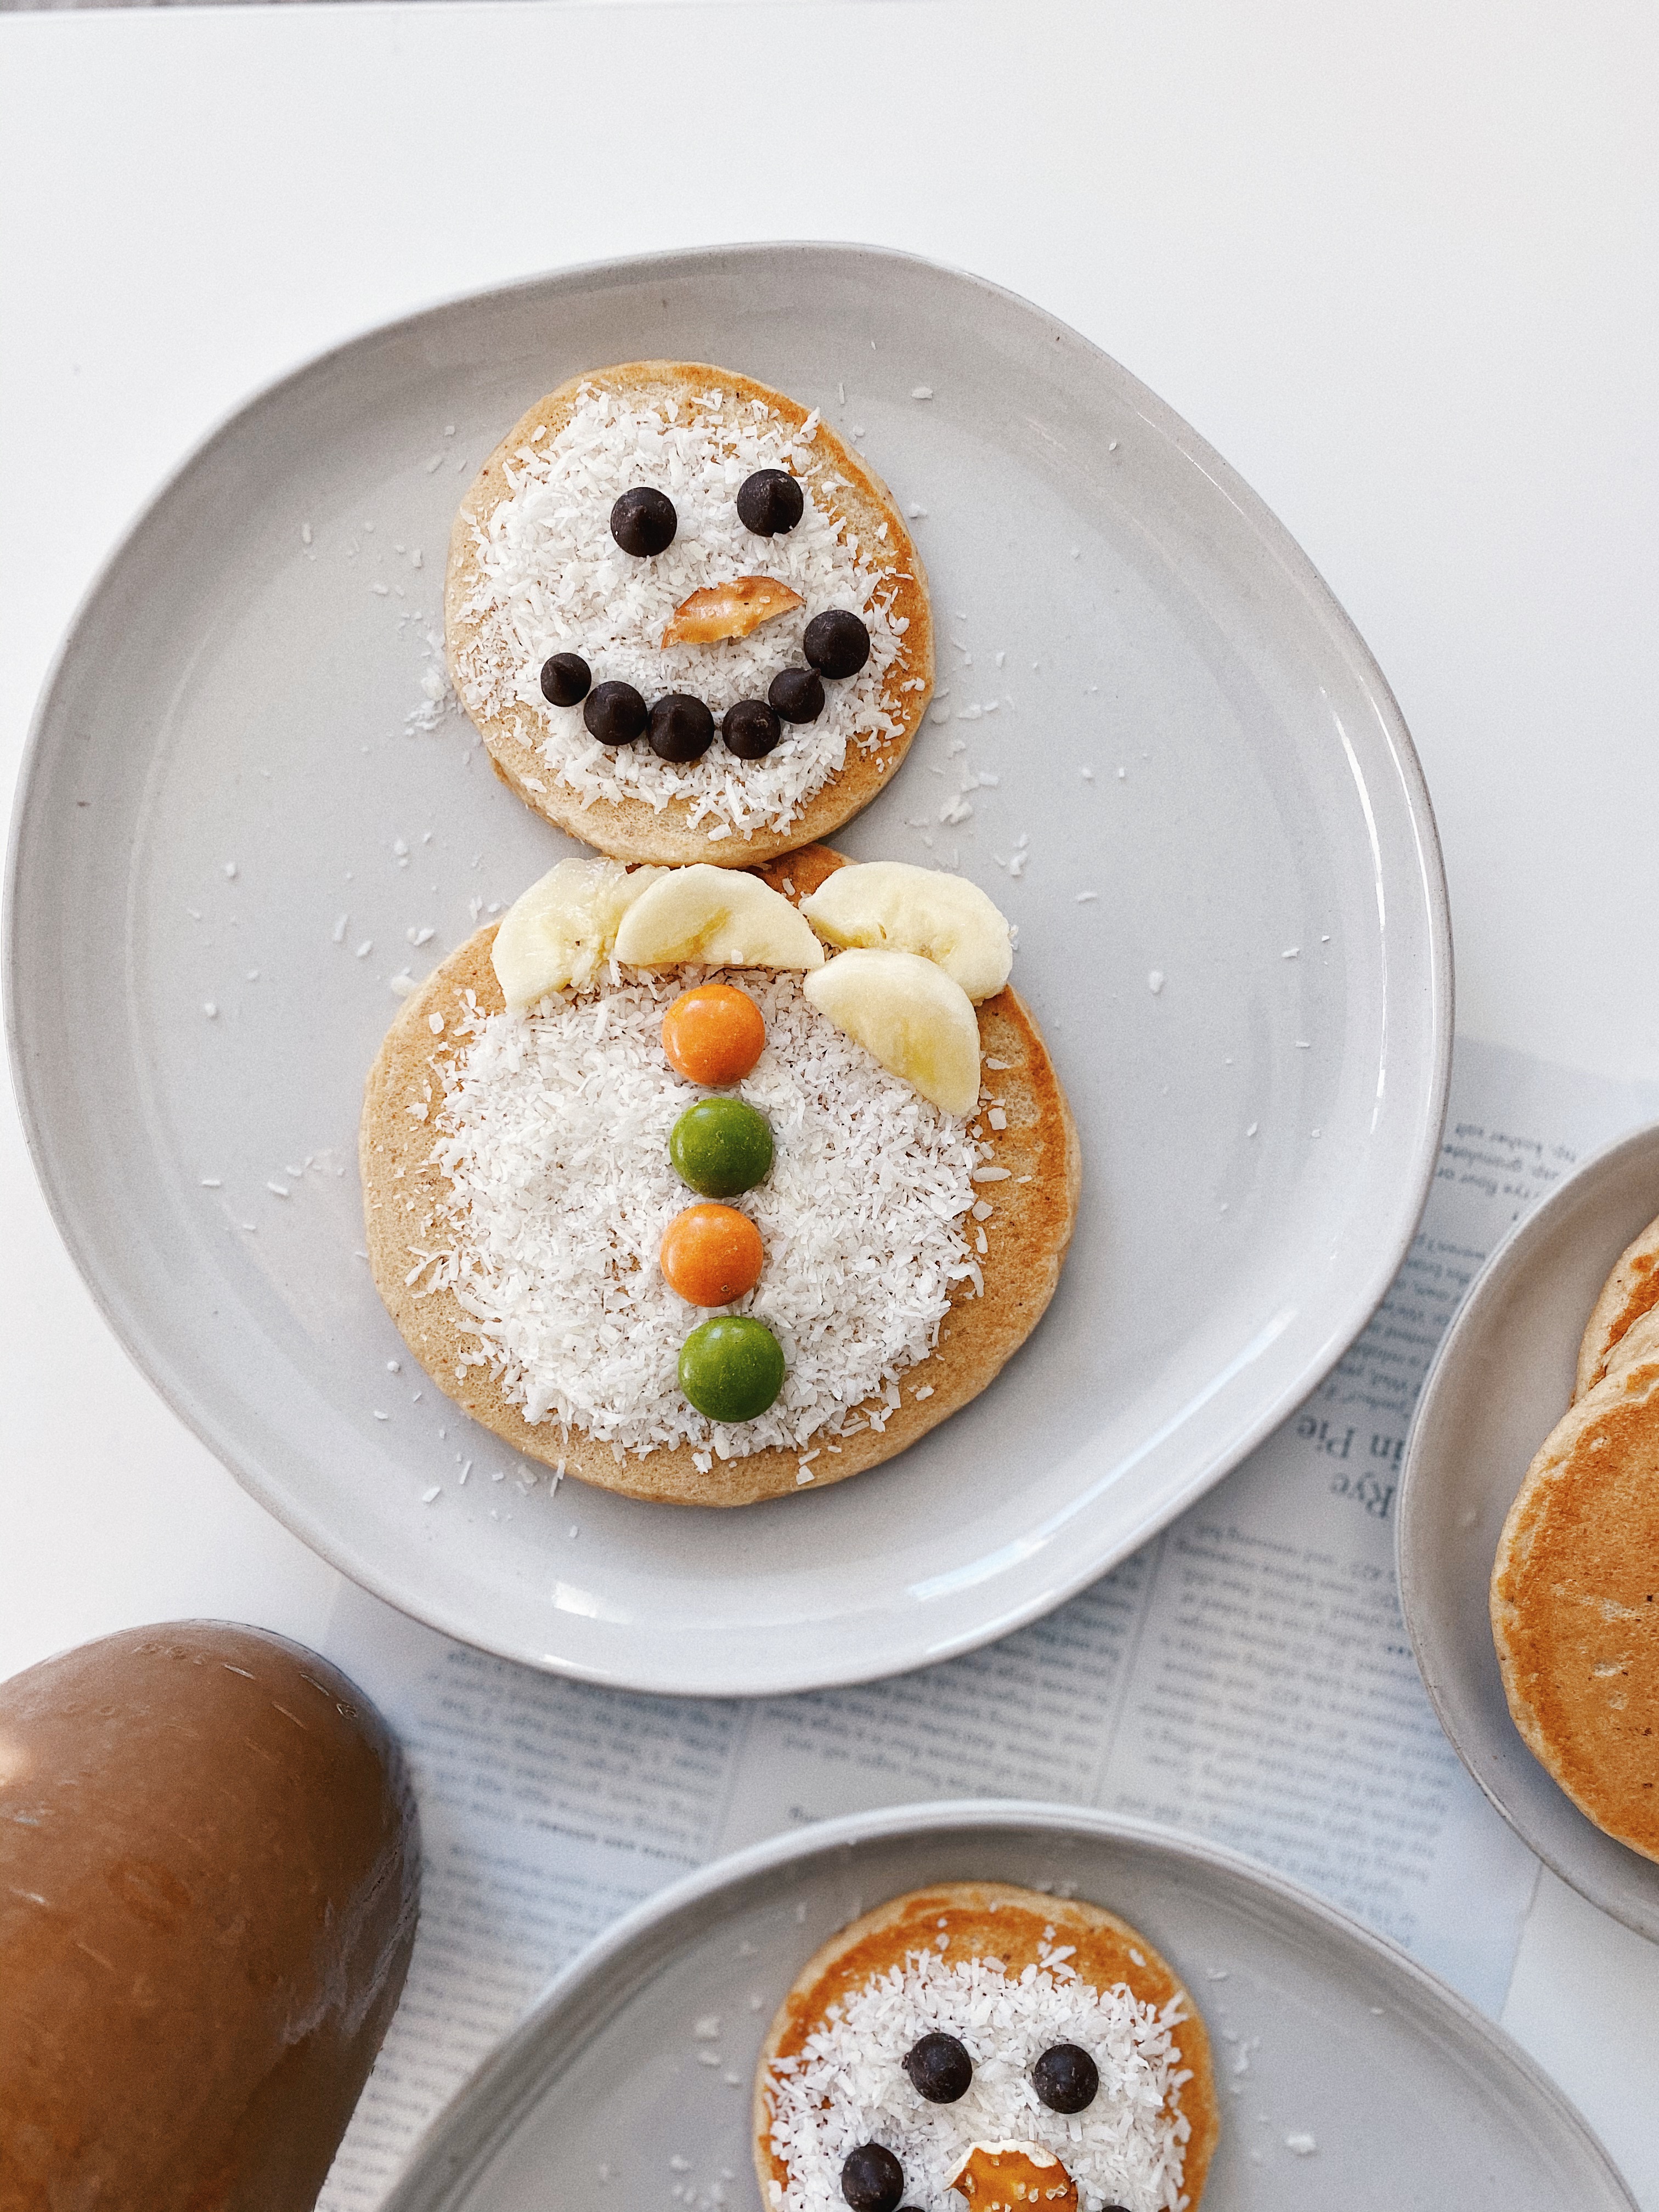
Gluten Free Gingerbread Snowman Pancakes

Poppy is getting so close to being able to enjoy fun food like this. She can admire the face on the snowman and see that it is more than just a regular stack of pancakes. But then there are small things like chocolate candies and dark chocolate chips that she will 500% choke on. So for now these little guys are for Joel and I while Poppy gets the button and faceless snowman. She honestly didn’t even notice because she was so obsessed with the coconut on the pancakes as “snow”.

Processed with VSCO with hb2 preset

I saw Ambitious Kitchen make pancake snowman like this and I knew I had to recreate! I used my gluten free gingerbread pancake recipe but you can use any pancake recipe you’d like.

Processed with VSCO with hb2 preset

Gluten Free Gingerbread Pancakes:

  • 2 cups almond flour
  • 1/4 cup coconut flour
  • 1-2 teaspoon cinnamon (I really like cinnamon)
  • 1/2 teaspoon ground ginger
  • 1/4 cup coconut sugar (or my new favorite monkfruit sweetener from Lakanto)
  • 1 teaspoon baking powder
  • 1+1/4 cup almond milk
  • 3 eggs (I haven’t tried this with flax egg but maybe it would work?!)
  • 2 tablespoons molasses
  • 1 tablespoons melted coconut oil

Snowman toppings:

  • Chocolate colored candies for the buttons
  • Dark chocolate chips for eyes and smile (I used Lakanto)
  • Broken piece of pretzel slim for the nose
  • Coconut shreds for the snow
  • Maple syrup for topping

Directions:

  • Whisk together dry ingredients in a large bowl, set aside.
  • Mix together wet ingredients and gently mix into dry ingredients.
  • Make pancakes in two different sizes. I used a 1/4 cup measuring spoon for the body and 2 tbsps of batter for the head. Plate, top, drizzle with maple syrup, and enjoy!

I paired our snowman pancakes with my peppermint mocha cold brew!

Processed with VSCO with hb2 preset